


Game-Changing Keyframe Editor in DaVinci Resolve 20 | Complete Walkthrough
May 01, 2025
Davinci Resolve Tutorial
DaVinci Resolve 20 brings a major upgrade for animators and editors working in the Edit page — the brand-new Keyframe Editor. Whether you’re creating smooth zoom-ins, complex transitions, or simply fine-tuning motion graphics, this tool makes animation much more intuitive than in previous versions.
In this article, I’ll walk you through how to use the new Keyframe Editor and explore the features it offers.
Keyframing in Previous Versions (Resolve 19 and Earlier)
In DaVinci Resolve 19 and prior, you would:
1. Select the clip.
2. Open the Inspector.
3. Add keyframes manually by clicking the diamond icons next to parameters.
4. Then, to view or adjust these keyframes, you’d click the small diamond icon in the top-right of the timeline clip. This would open a system tray where you could manage your keyframes and animation curves.
This method worked, but it was limited in flexibility and visibility.
What’s New in DaVinci Resolve 20
Resolve 20 introduces two dedicated windows for working with keyframes:
1. Mini System Tray
Click the "Show System Tray" icon on your timeline clip. This opens a small tray giving you quick access to keyframes for that layer. You can:
• Select keyframes.
• Move them around.
• Adjust their values directly in the tray.
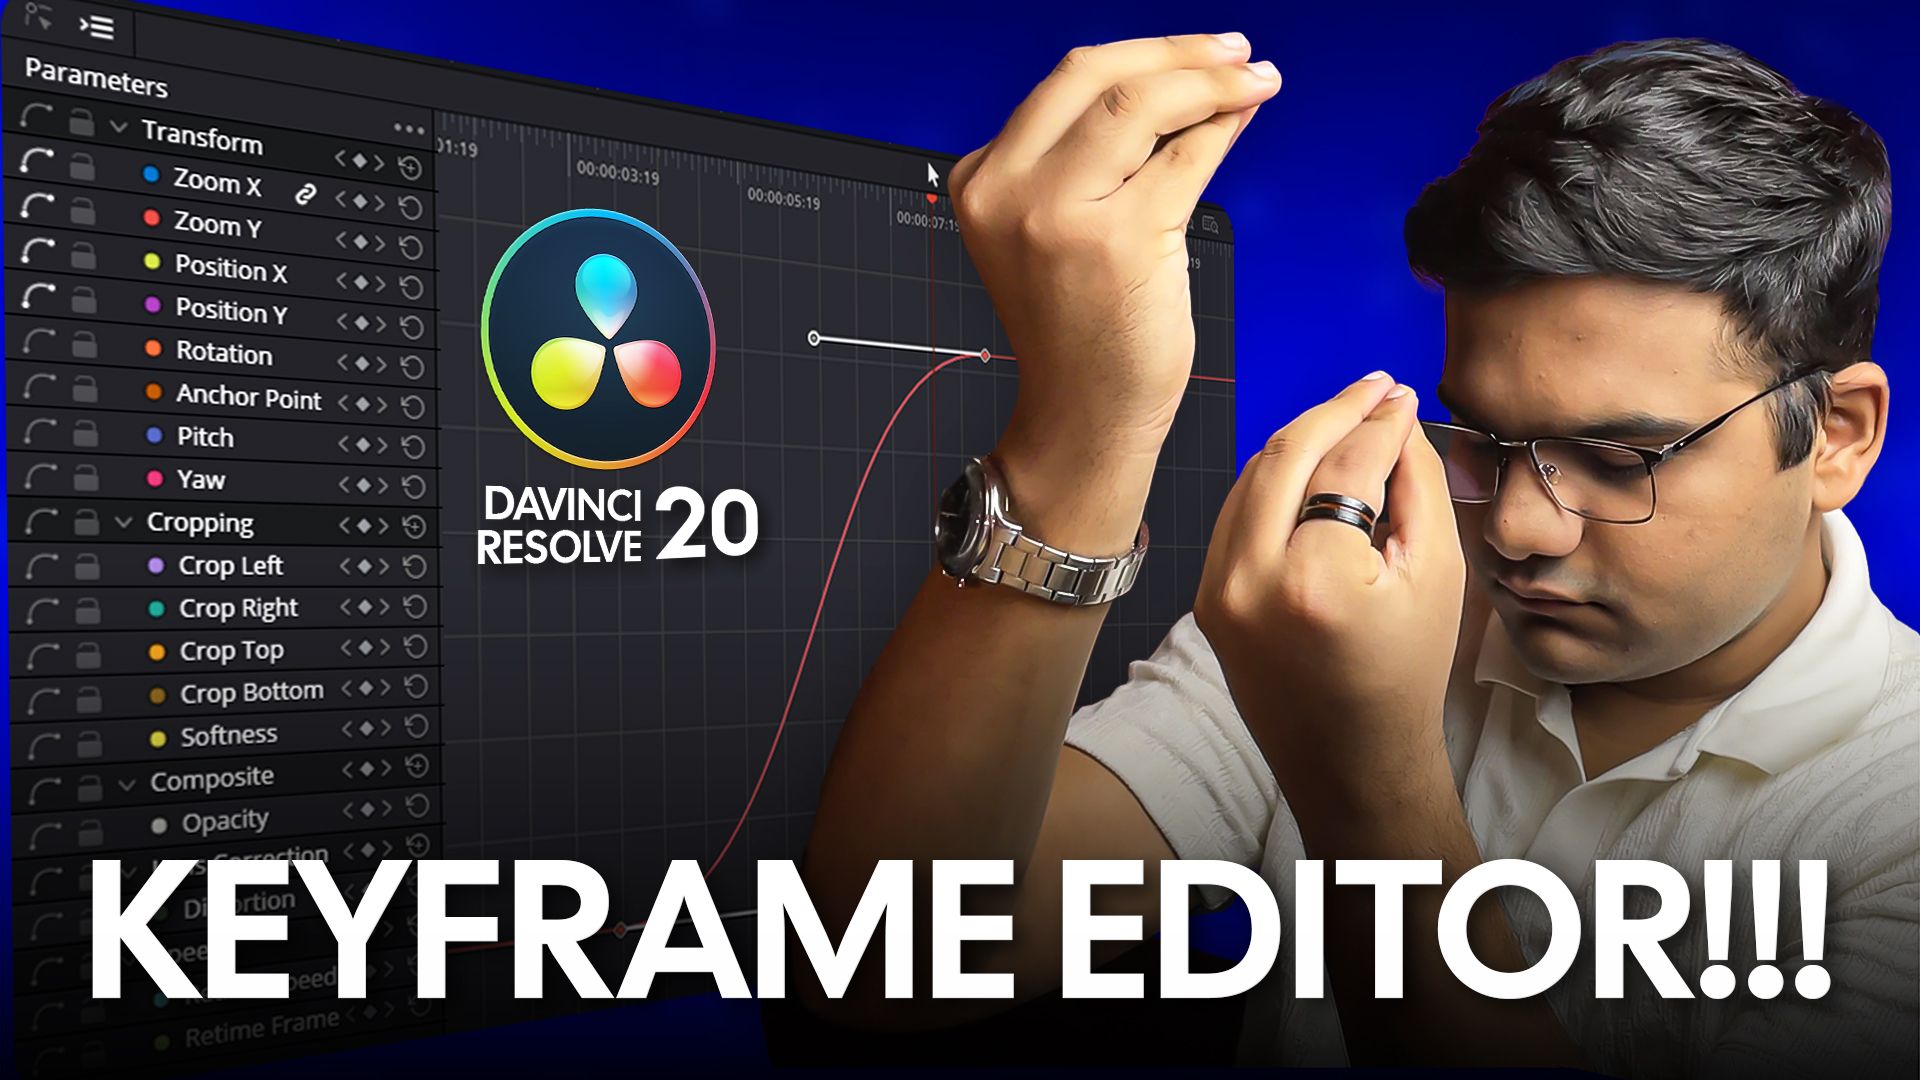
2. Full Keyframe Editor
This is the real game-changer. Click the Keyframe Editor button in the toolbar and a full editor opens up showing:
• All clip parameters: transform, cropping, composite mode, lens correction, speed, and more.
• Keyframe navigation tools.
• Graph controls for smoothing motion.
You’ll find the graph view under the “Keyframe Curves” button in the top-left. Zoom in or out using the dedicated tool, and you’ll have complete control over your animation curves.
Smoothing Animations
By default, keyframes are linear. But Resolve 20 lets you easily adjust motion using:
• Ease In
• Ease Out
• Ease In and Out
Simply select your keyframes, choose the smoothing option, and your animation becomes more natural.
Timeline Zoom and Navigation Tools
There are two zoom options:
• Detail Zoom: Focus on selected keyframes.
• Full Extent Zoom: View the entire timeline.
Other useful tools:
• Hand Tool: Lets you pan around the keyframe timeline.
• Cursor Tool: Select and move keyframes freely.
You can also add new keyframes manually and adjust their curves using the handle mode.
Full Screen and Parameter Filtering
Need more space? Click the Pop-Out Window button to maximize the Keyframe Editor. You’ll now have an expanded view of both parameters and their curves.
Resolve also lets you filter which parameters are visible:
• Display Parameters with Keyframes: Shows only those with animation (like pressing U in After Effects).
• Display All Video Parameters: Shows every possible animatable setting.
• Display Selected Parameters: Manually choose only the ones you need.
You can also choose to expand or collapse all parameter groups for a cleaner view.
Works with All Layers — Including Adjustment Clips
Initially missing in Beta 1, support for adjustment clips is now back in Beta 2. That means you can apply animations and effects on adjustment layers just as easily as you would on video clips, making your workflow more flexible and efficient.
Final Thoughts
The new Keyframe Editor in DaVinci Resolve 20 is a massive step forward. It simplifies animation, gives you powerful curve control, and makes keyframe management more user-friendly — all without leaving the Edit page.
If you found this guide helpful, consider checking out more of my video editing tutorials.
🚀 By the way…
If you’re a podcaster looking for a reliable freelance video editor to handle your podcast edits with precision, great pacing, and modern motion graphics,
I offer freelance podcast video editing services on Contra.
You can check out my work and hire me directly through my Contra profile 🔗[HERE]
Thanks for reading, and I’ll see you in the next one!

* with sam
Made in मुंबई
©WITH SAM 2026 ALL RIGHTS RESERVED